How to create WebView App / build APK file / run in emulator Using the Android Studio WebView.
Table of contents
- Utilizing Android Studio
- What Makes Android Studio the Perfect IDE?
- Introduction
- How to create an Android WebView app for publishing on Google Play online web store
- Modifying MainActivity.java class file (add uses-permission android name android.permission.INTERNET property)
- Replacing TextView with WebView
- Changing ConstraintLayout to RelativeLayout
- How to find WebView component and add it to main android app view
- Where and how to import Android webkit WebSettings, WebView and WebViewClient classes / objects into your Android app.
- Enter example WebView code into your MainActivity.java file
- Enter second sample WebView code into MainActivity.java file
- How to build and generate APK file in Android Studio
- How to launch your WebView APK file in Android Studio device emulator
- Conclusion
Utilizing Android Studio
Your phone's apps were all made using an Integrated Development Environment (IDE). The official IDE for developing Android apps is called Android Studio. The majority of the applications you use on your Android phone were made with Android Studio, which is also the most popular IDE.
What Makes Android Studio the Perfect IDE?
Numerous more toolchain components, including the Gradle build system, are included into Android Studio. As a result, setting up this IDE for Android programming is the simplest.
For developers, it features a fantastic graphical user interface that makes designing apps easier and more pleasant.
It includes an emulator built in that makes testing and debugging your program simple. In order to test apps, it may also connect to your smartphone.
- You may develop a variety of apps with Android Studio and a variety of programming languages. It enables you to launch your app quickly with its comprehensive built-in templates.
Want to create your first Android app but delaying because you lack Android Studio knowledge? To learn how to use Android Studio, read this guide.
Download the Android Studio and Install.
This YouTube video will serve as a guideline for this tutor. Watch Here
Introduction
This post will go through how to use Android Studio WebView to create WebView apps, compile APK files, and execute them in emulators. These topics are covered in this tutorial:
- How to create an Android WebView app for publishing on Google Play online web store.
- Modifying MainActivity.java class file (add uses-permission android name android.permission.INTERNET property)
- Replacing TextView with WebView
- Changing ConstraintLayout to RelativeLayout
- How to find WebView component and add it to main android app view
- Where and how to import Android webkit WebSettings, WebView and WebViewClient classes / objects into your Android app.
- Enter example WebView code into your MainActivity.java file
- Enter second sample WebView code into MainActivity.java file
- How to build and generate APK file in Android Studio
- How to launch your WebView APK file in Android Studio device emulator
Download the Android Studio and Install.
How to create an Android WebView app for publishing on Google Play online web store
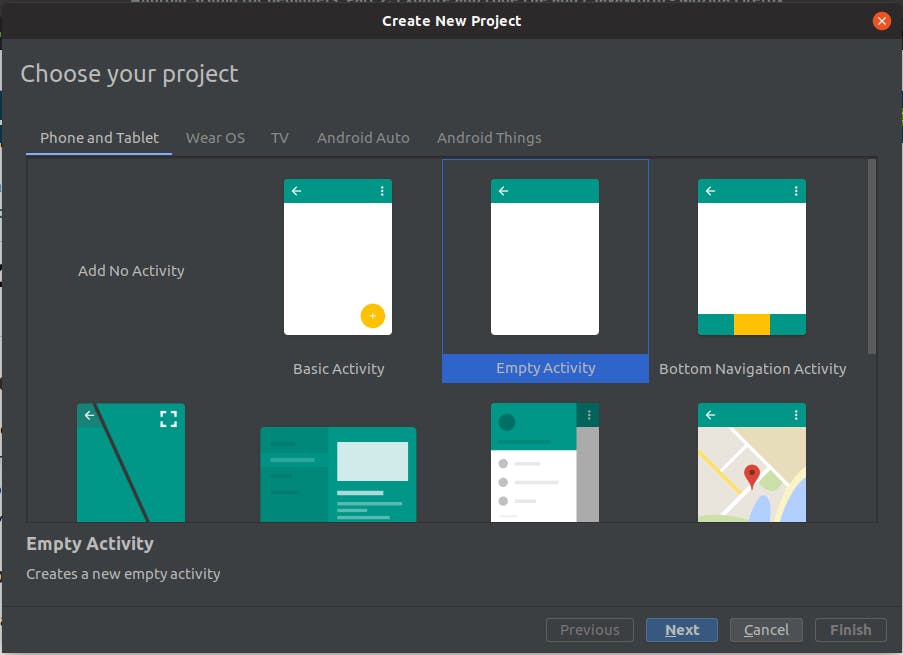
It's time to decide how your app's first Activity will look. One screen or view of your program is often implemented using an Activity. We'll choose an Empty Activity so that you may start fresh.
Open a New Project in Android studio and select Empty Activity click Next.
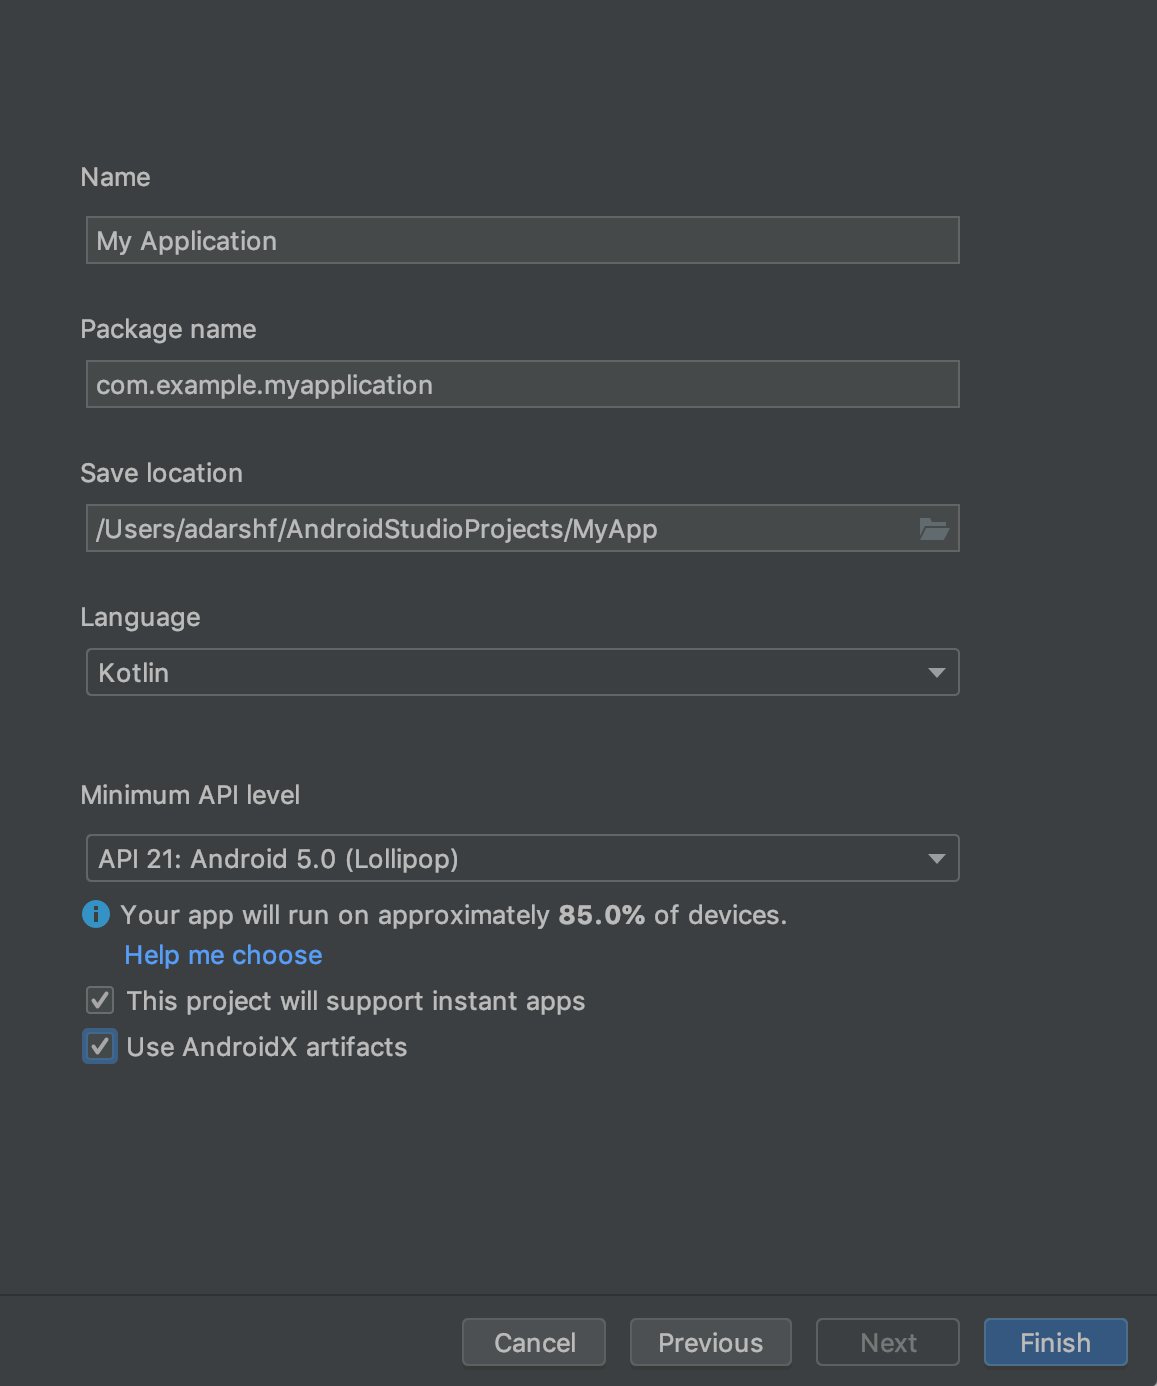
Create a New Application and change Language from Kotlin to Java then click Finish. Installing it will take some time. Note: if the Firewall box appears click Allow Access, it will take some time for Android Studio to download Gradle.
Modifying MainActivity.java class file (add uses-permission android name android.permission.INTERNET property)
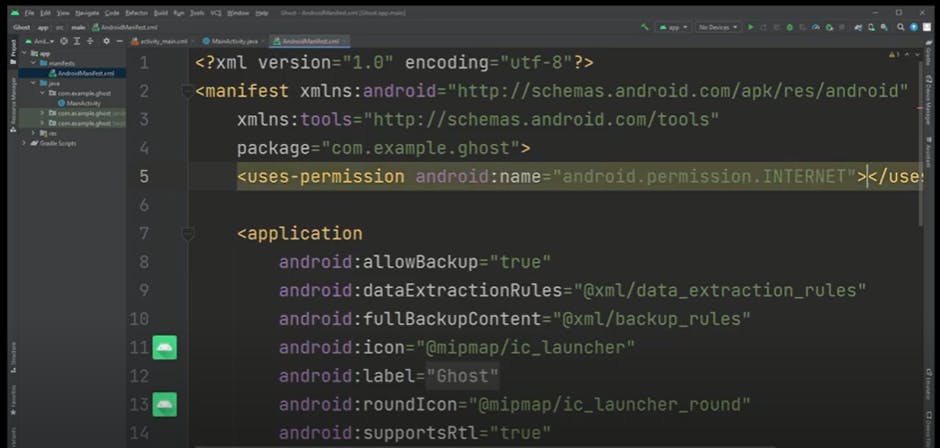
Click AndroidManifest.xml in the Manifest folder in the top-left corner when the item has finished downloading.
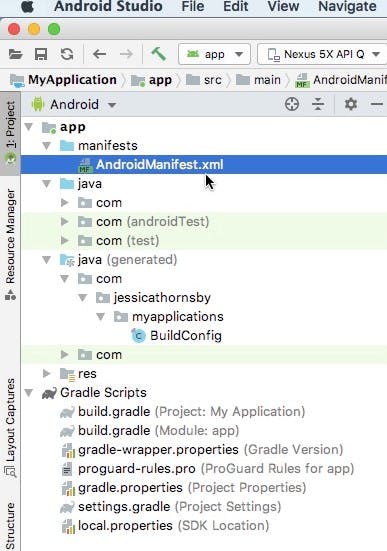
Type `
< uses-premission andriod:name ="andriod.premission.INTERNET"> </uses-premission>
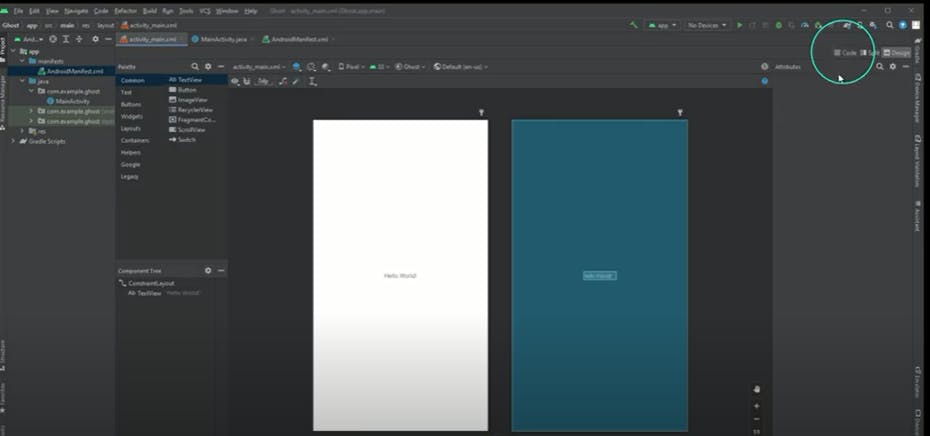
 Select activity main.xml from the upper-left corner, and then a view appears; from this page, click the code link in the upper-right corner.
Replacing TextView with WebView
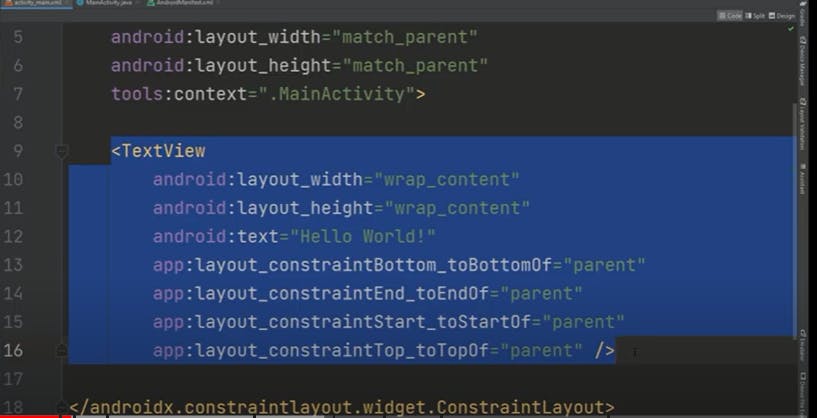
Remove the TextView Component completely by selecting it and deleting
Changing ConstraintLayout to RelativeLayout
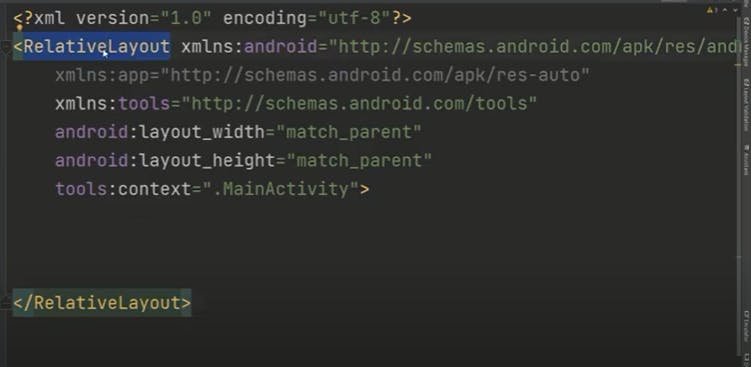
Rename this component androidx.constraint.layout.widget.Constrant to Relative
How to find WebView component and add it to main android app view
Go to Design on the top-right corner, then click the search button and enter Web because we're looking for the WebView Component.
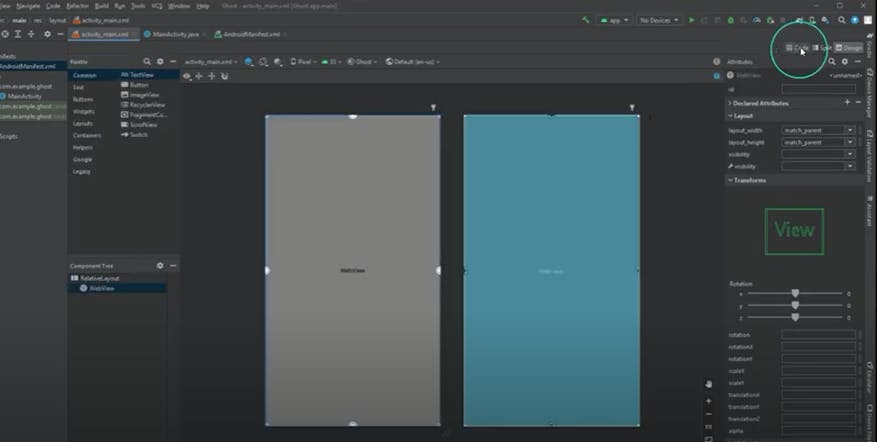
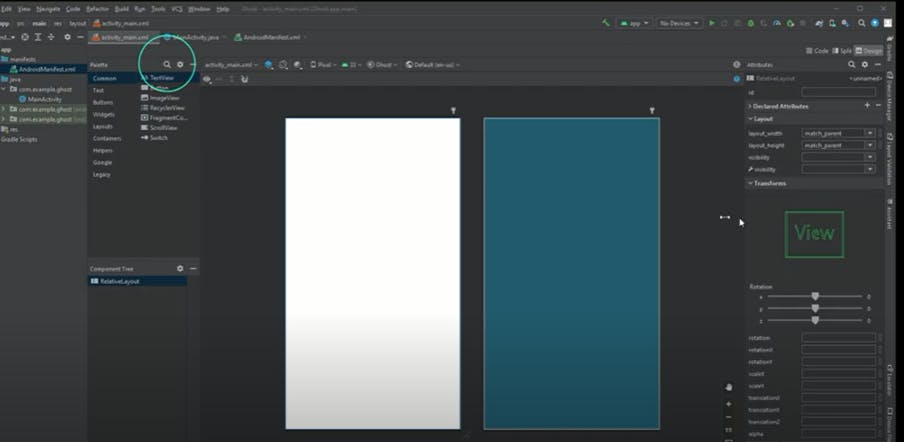 Click and drag the WebView Component
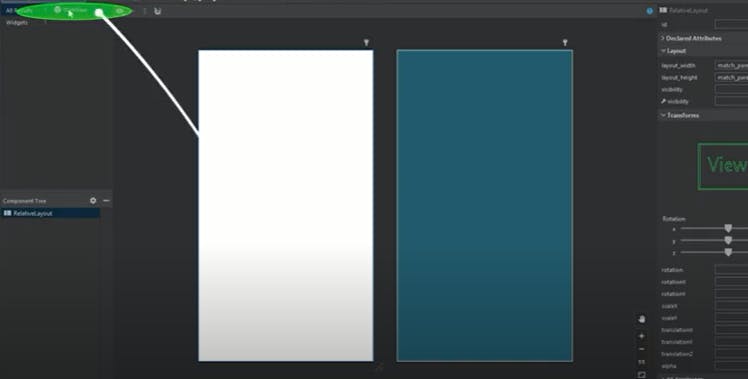
Go to code in the top-right corner.
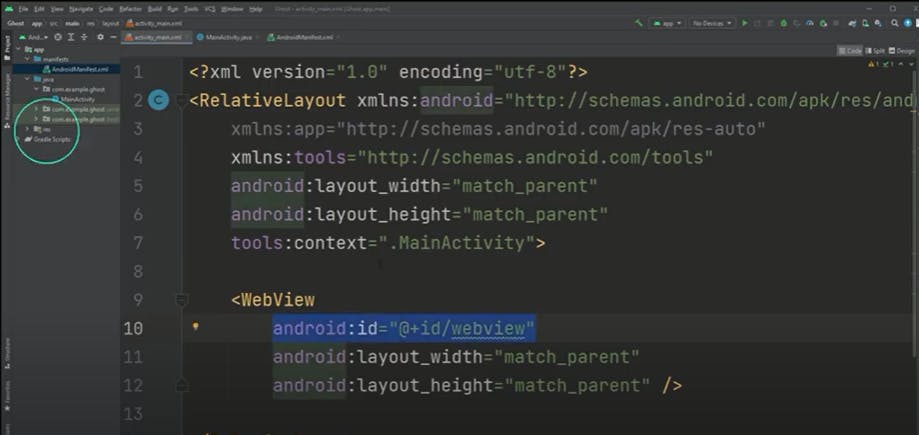
Go to the WebView and type android:id"@+id/webview"
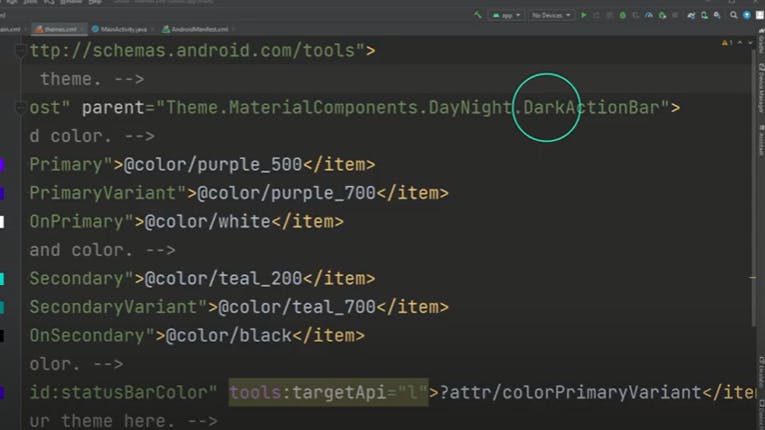
Open the values folder in the res folder, then click on the theme folder select theme.xml
Replace Dark with NoActionBar in the file instead of DarkActionBar.
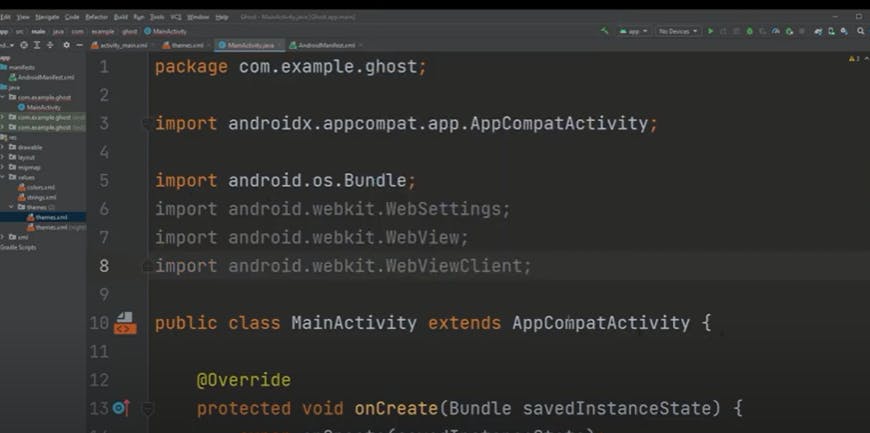
Where and how to import Android webkit WebSettings, WebView and WebViewClient classes / objects into your Android app.
Go to the mainactivty.java then expand import
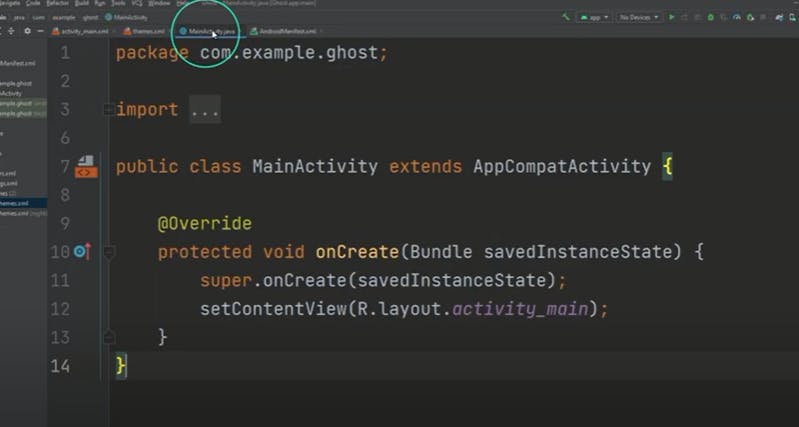
Then import the following at the bottom of import android.os.Bundle;
Enter example WebView code into your MainActivity.java file
Now go to the MainActivity class then type private WebView myWebview
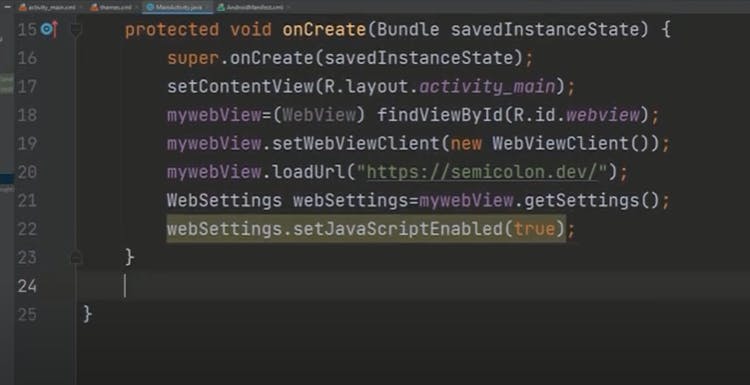
Then copy this code
mywebView=(WebView) findViewById(R.id.webview); mywebView.setWebViewClient(new WebViewClient()); mywebView.loadUrl("example.com"); WebSettings webSettings=mywebView.getSettings(); webSettings.setJavaScriptEnabled(true);
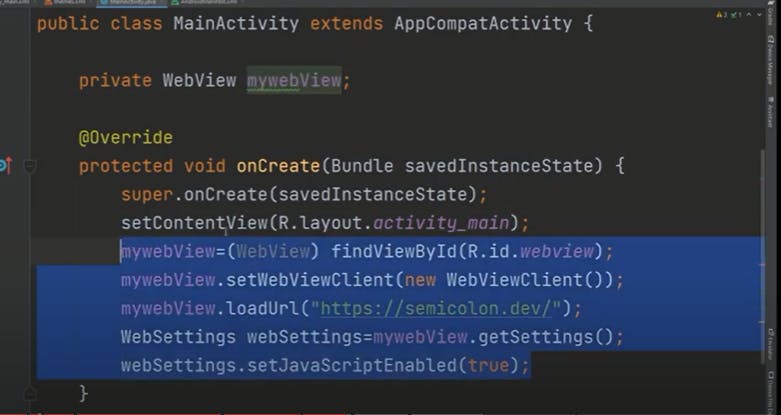 Replace example.com with the url of your WebView App
Enter second sample WebView code into MainActivity.java file
copy these codes
public class mywebClient extends WebViewClient {
        @Override
        public void onPageStarted(WebView view, String url, Bitmap favicon) {
            super.onPageStarted(view,url,favicon);
        }
        @Override
        public boolean shouldOverrideUrlLoading(WebView view, String url) {
            view.loadUrl(url);
            return true;
        }
    }
   @Override
    public void onBackPressed() {
        if (mywebView.canGoBack()) {
            mywebView.goBack();
    } else {
        super.onBackPressed();
    }
}
Paste the code below onCreate method
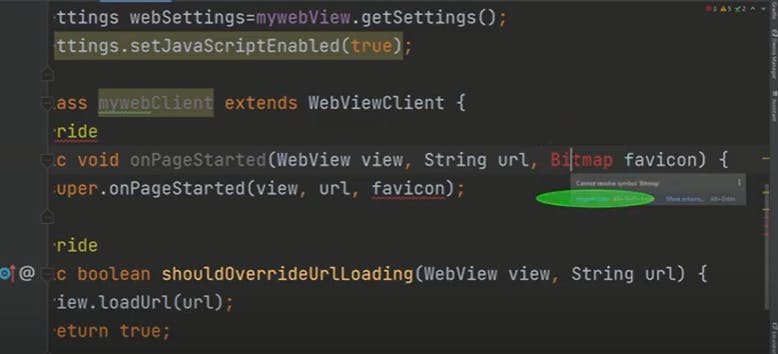
Click on Bitmap object on your code, then click on import class
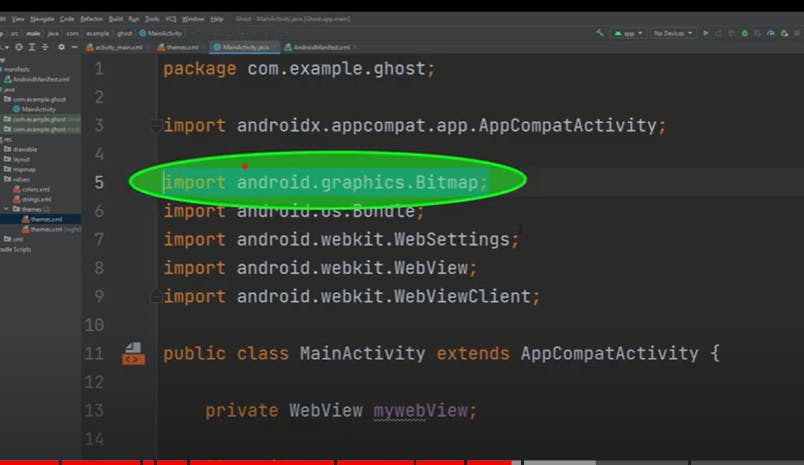
The Bitmap class imported
How to build and generate APK file in Android Studio
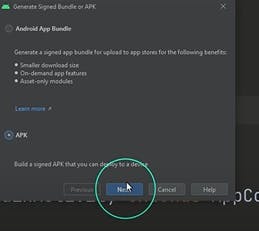
We are ready to build APK. Go to Build on the top-left corner and select Generate signed Bundle/APK option, make sure the APK radio button selected and click Next
Click create new to start creating a key store path.
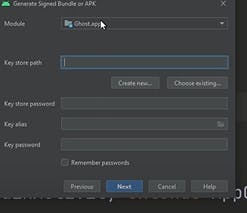 Remember to choose the folder where we want to generate the file when you pick the folder in the file exploder that appears in the top-right corner.
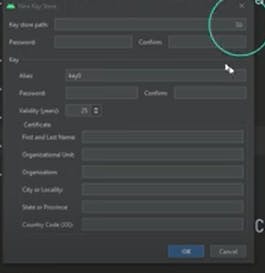
Go to project, name your new folder, then create your jks file at the bottom.
Complete the remaining fields and enter your password four times in each of the four boxes.
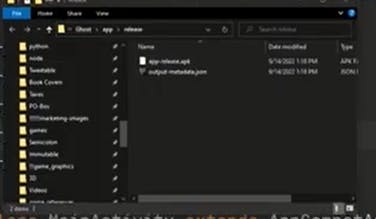
 Expand the box when the APK file has finished compiling and Go to Locate the file, It will display our completed, launch-ready APK file.
How to launch your WebView APK file in Android Studio device emulator
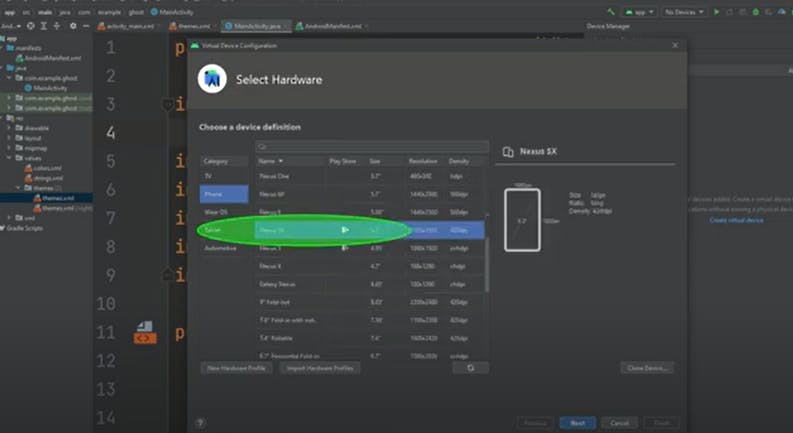
click the create device button after selecting the icon.
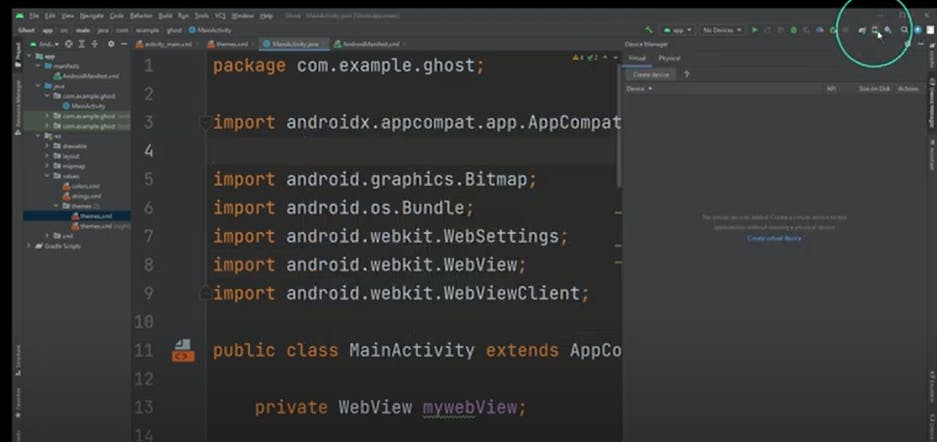 Select "Phone," then "Nexus 5X" and then click "Next."
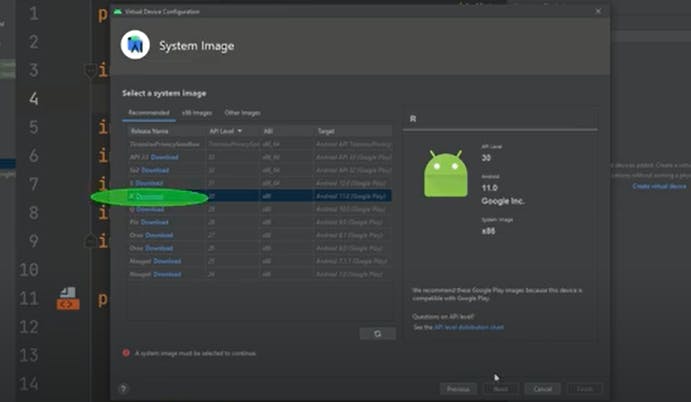
 Wait for the installation to finish after clicking the download button, then click on the Next.
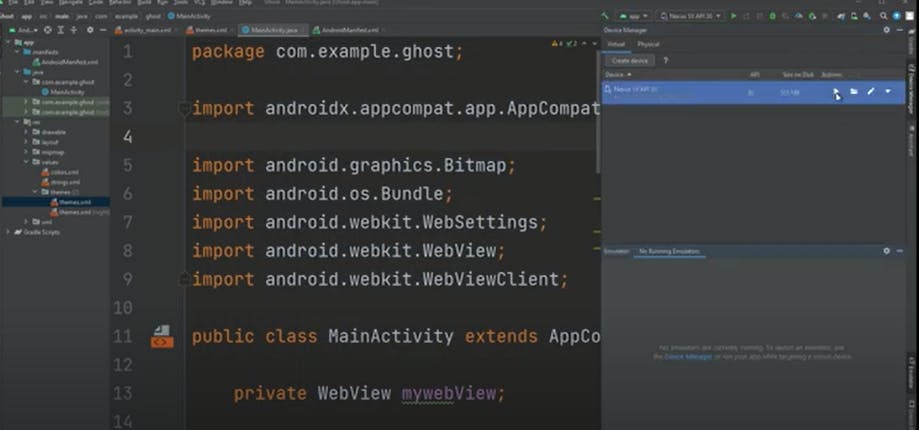
Clicking the play button in the Next screen's upper-right corner will start the corresponding device's emulator, then wait few minutes to load.
 When it's finished, open your built apk file and drag it onto your device.
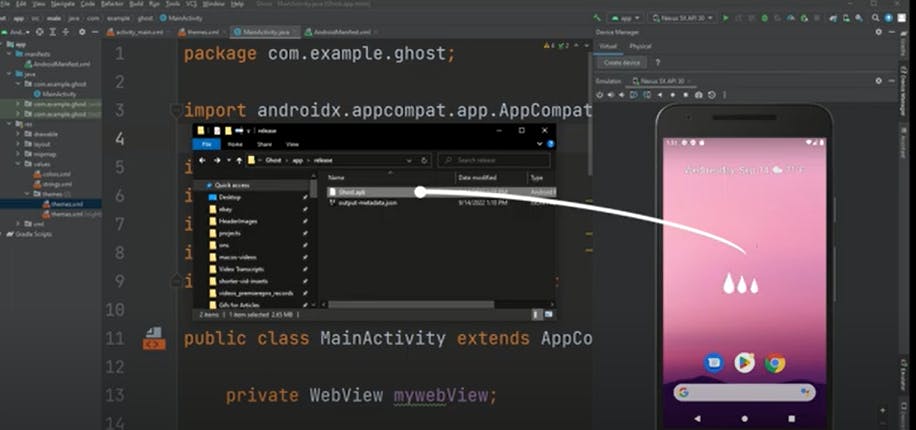 Your WebView application will be added to the device as a result, and you can then see it in your list of connected devices.
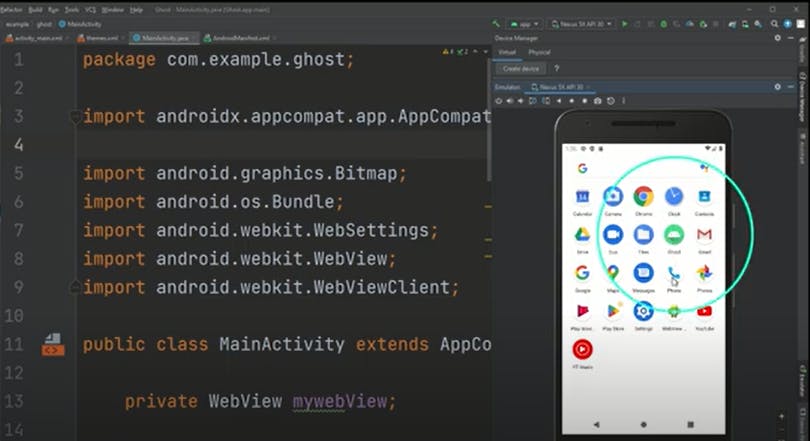
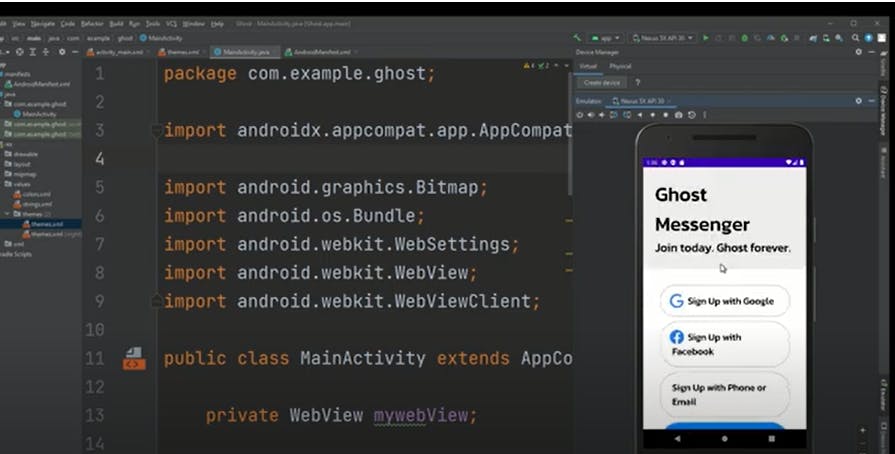
When you click the WebView App icon, the device will open and you may use it as normal.
Conclusion
You are now capable of using Android Studio. You've just been given a sneak preview of a whole new universe through this lesson.
It's time to start working on your first app. The fact is that your initial app won't be all that great. Both your second and third are not. But it is how we as developers learn and advance. But I'm certain that your fourth application will be well received!
Never forget that practice makes perfect.
The YouTube video that serve as a guideline for this tutorial. Watch Here
